Platform & Account Help
Everything you need to set up and manage your account.
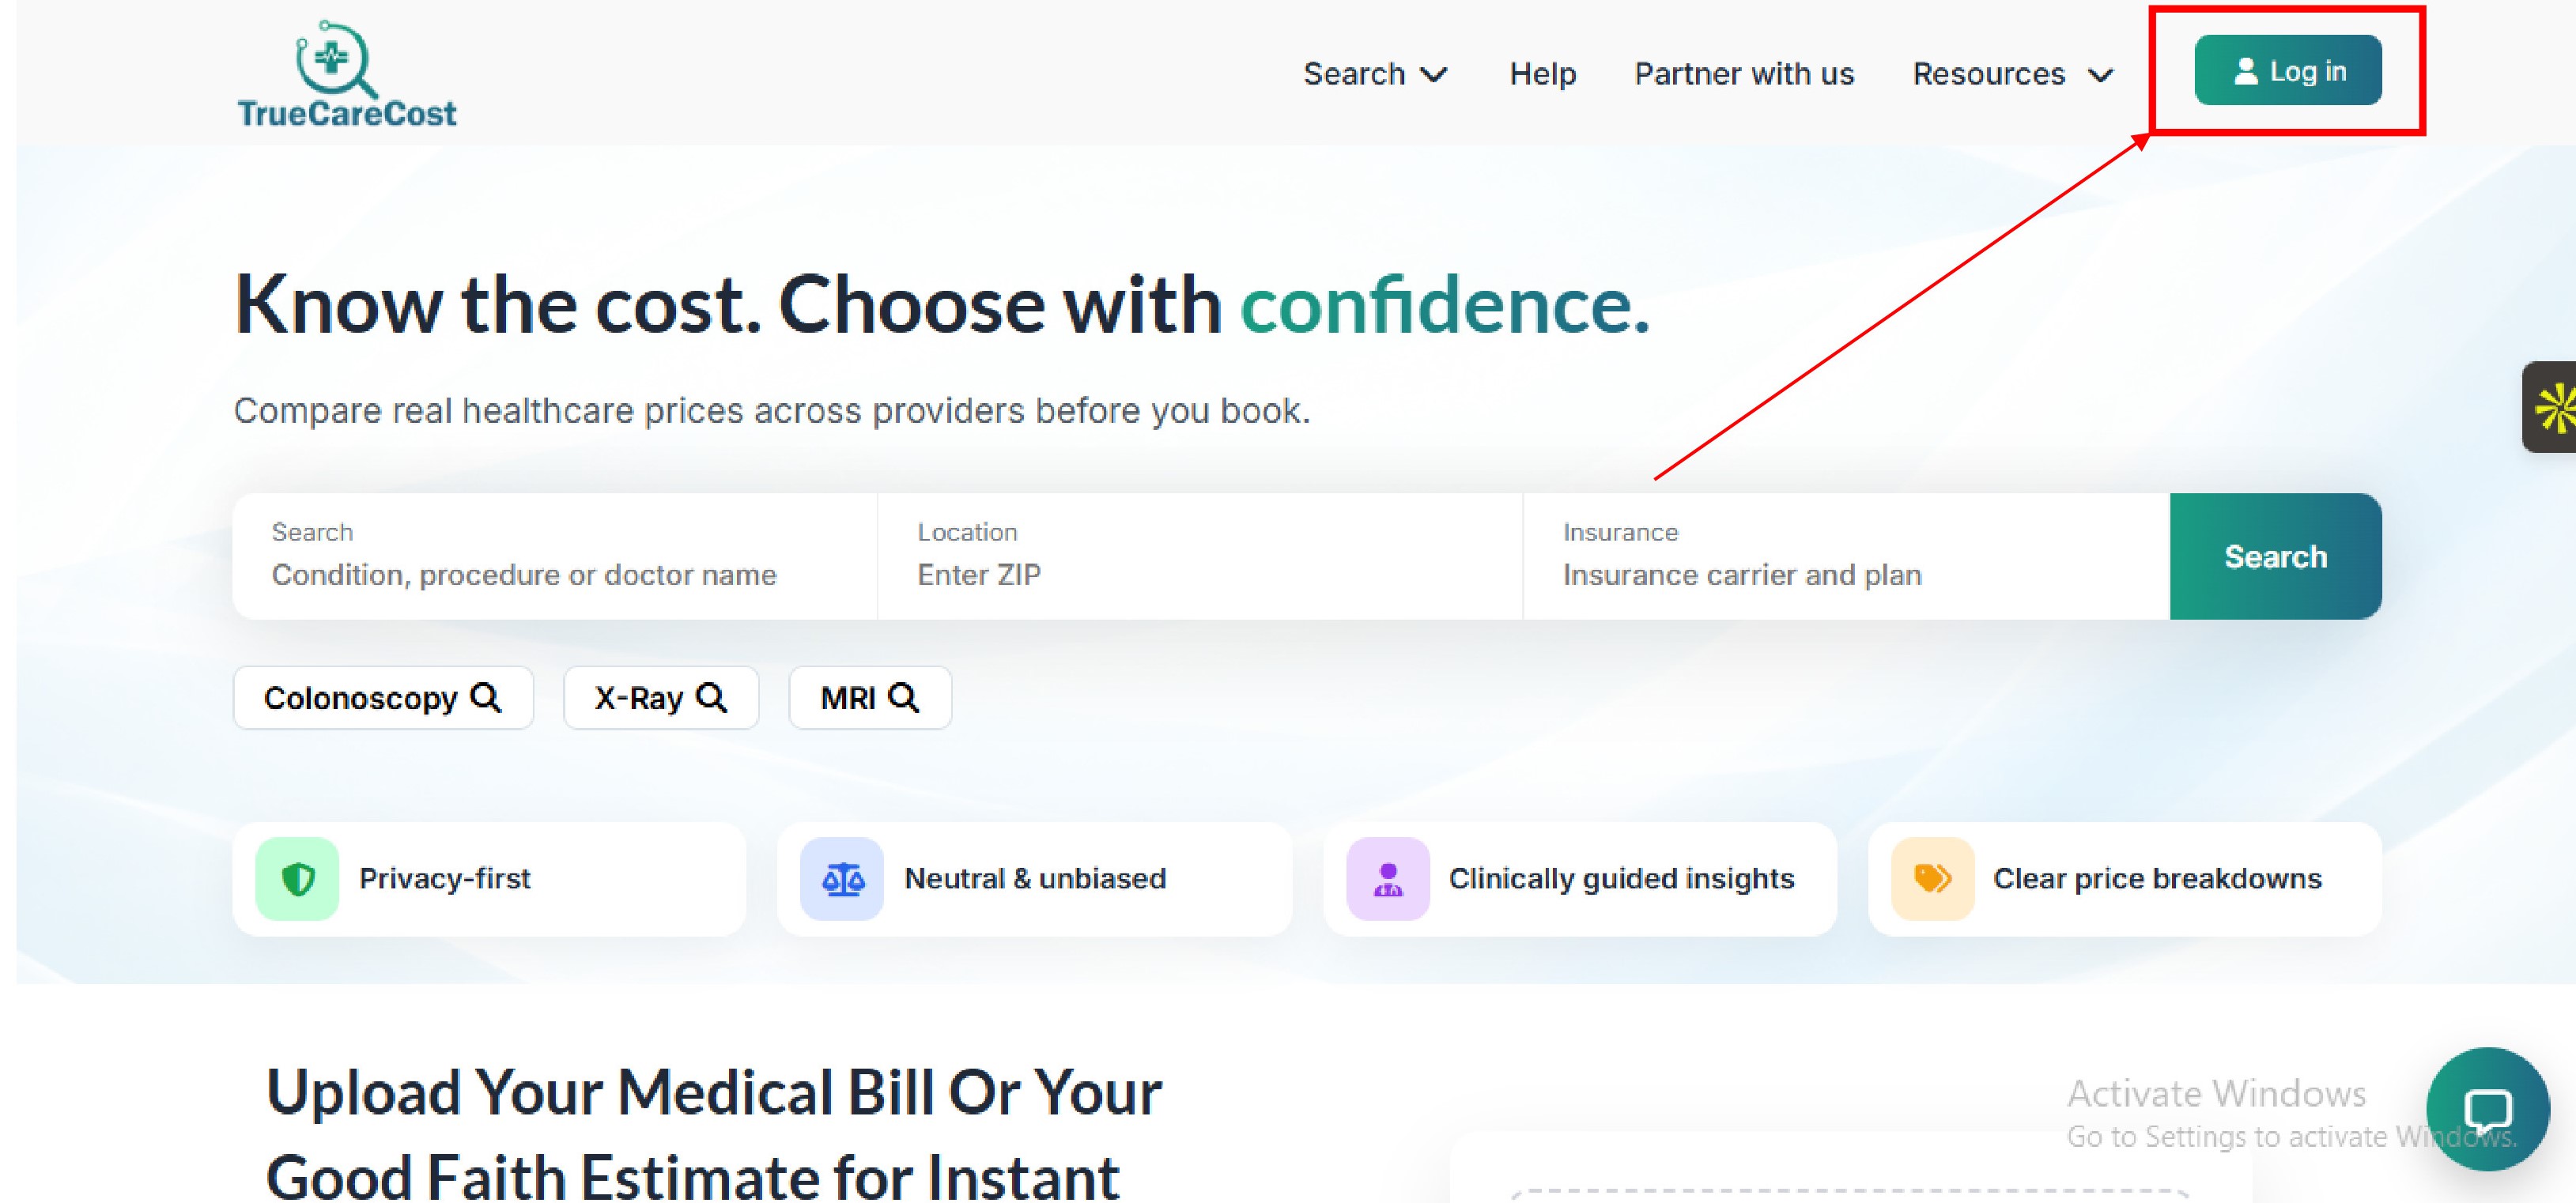
Go to the homepage and click Sign Up in the top-right corner. See where to go
Click the Sign Up button in the top-right corner of the homepage to get started. The button is visible on every page when you are not logged in.
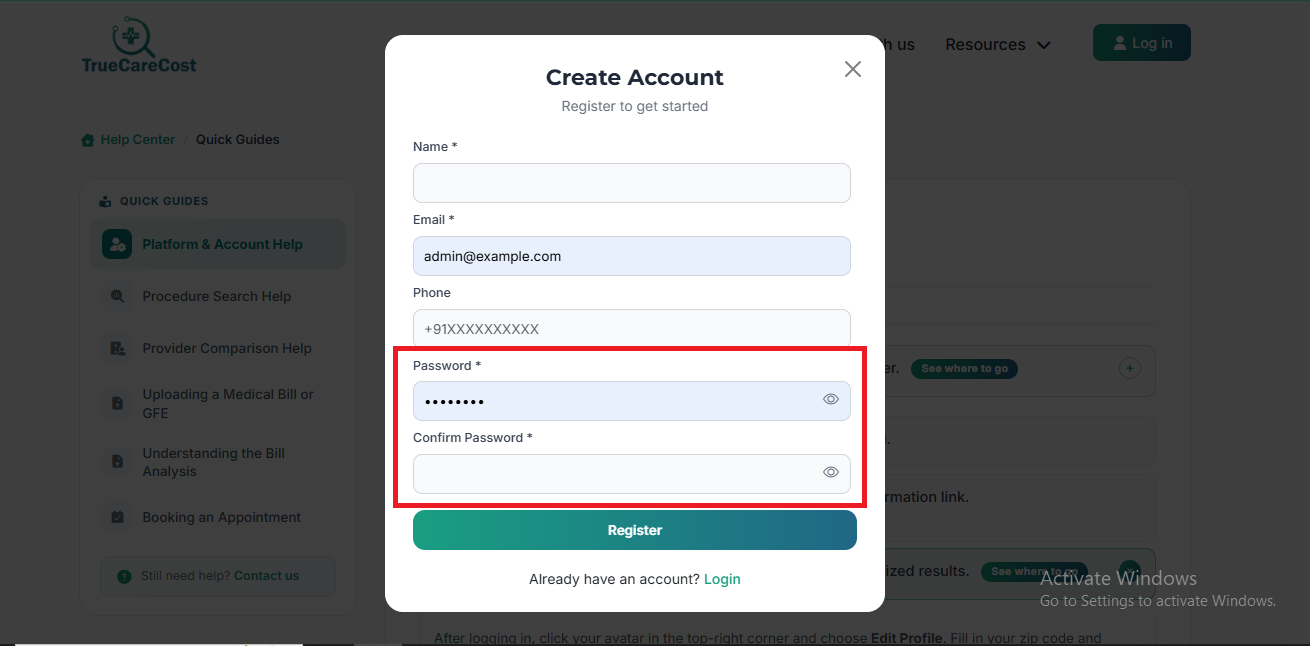
Enter your full name, email address, and a secure password.
Check your inbox for a verification email and click the confirmation link.Didn't receive it? Check your spam folder or request a new one.
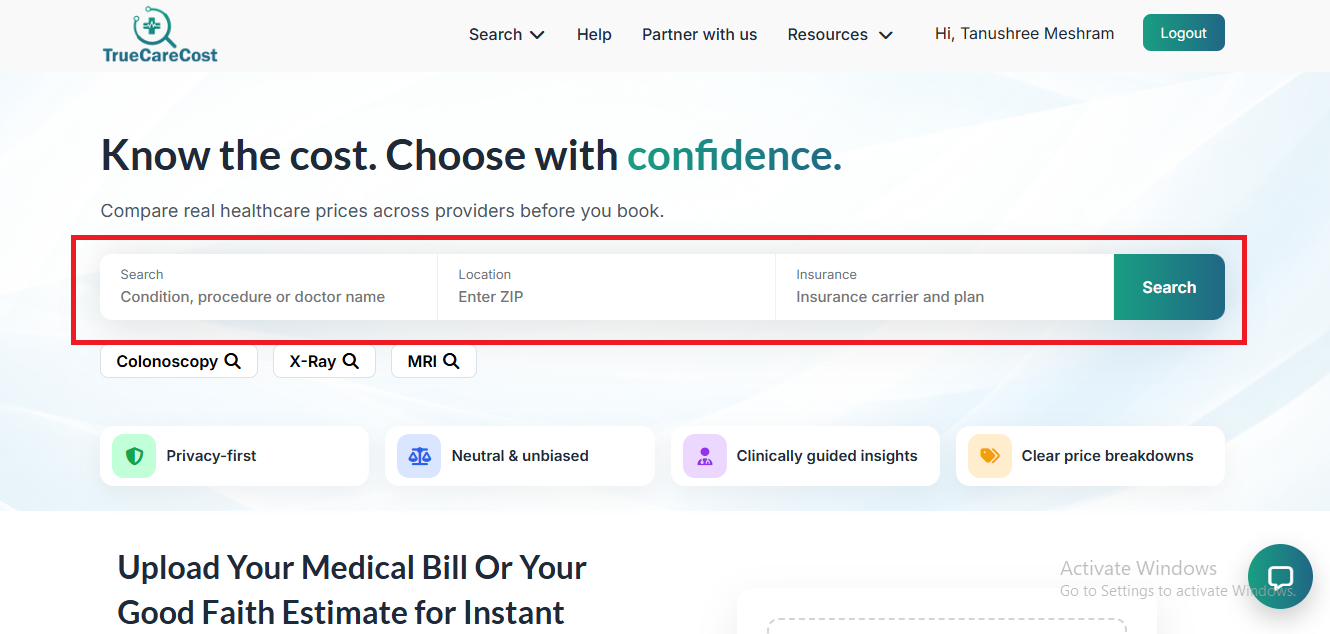
Once verified, log in and complete your profile for personalized results. See where to go
After logging in, click your avatar in the top-right corner and choose Edit Profile. Fill in your zip code and insurance details — this powers all location-based price results across the platform.
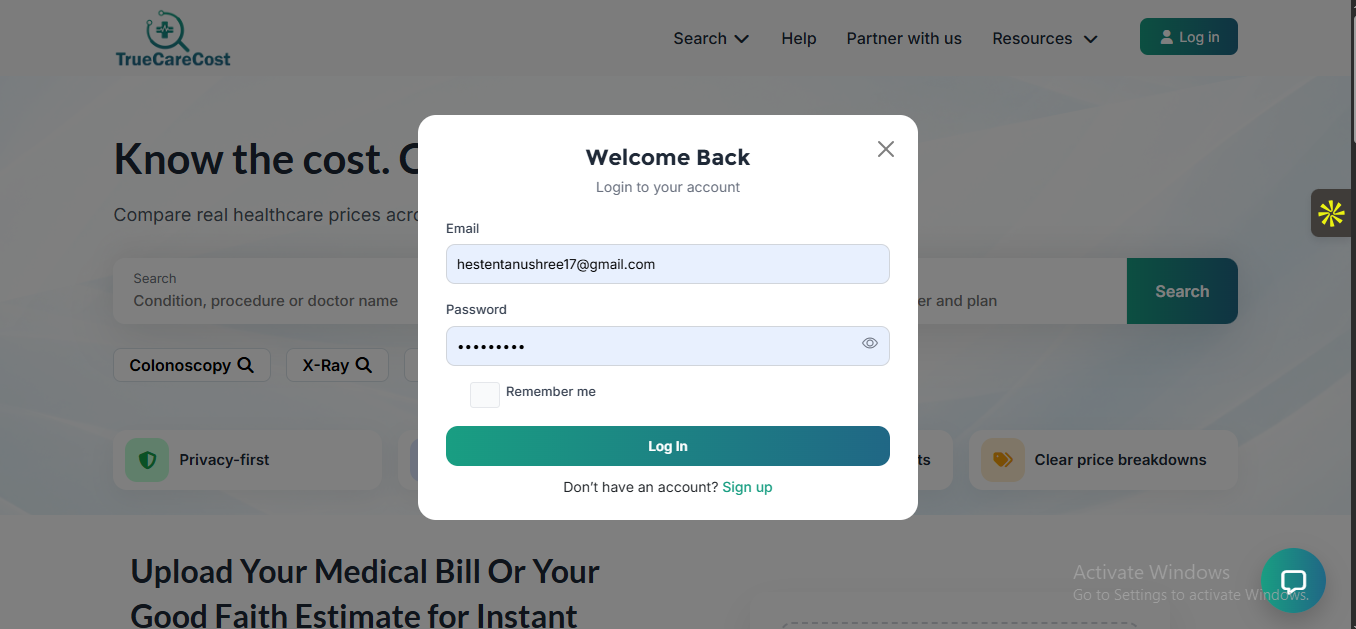
On the login page click Forgot Password?
Enter your registered email address and submit.
Open the reset email and click the secure link within 30 minutes.
Set a new password and log back in. See where to go
The reset link takes you to a Set New Password screen. Enter your new password twice to confirm, then hit Update Password. You'll be redirected straight to your dashboard.
Procedure Search Help
Find procedures by name, symptom, or CPT code.
Use the main search bar and type a procedure name, location and insurance. See where to go
On the Home Page, locate the search bar at the top of the screen. Type in a procedure name (e.g. "MRI"), a symptom, or a CPT code to get started. Suggestions may appear as you type — select one or press Search.
Select the best match from the auto-suggest dropdown.
Set your location using the zip code field to see nearby prices.
Review the price range overview — low, median, and high estimates are shown. See where to go
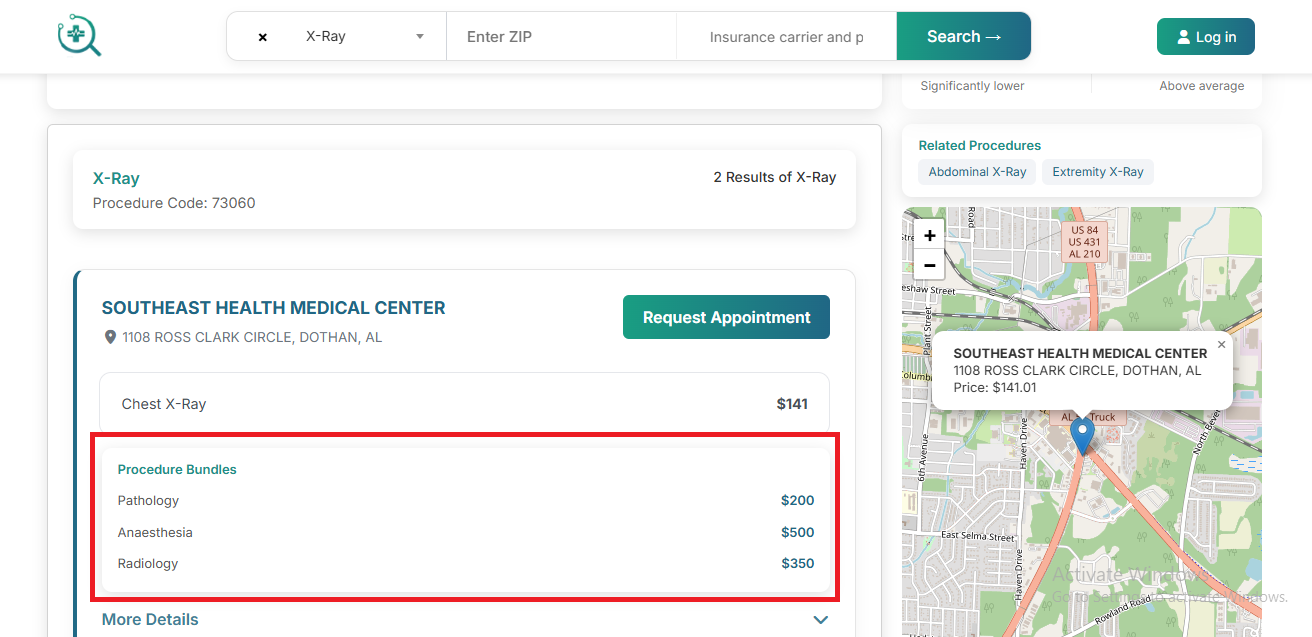
After hitting Search, the Results Page shows a price band at the top with low, median, and high estimates. Scroll down to see individual provider cards. Click any card to expand its full pricing breakdown.
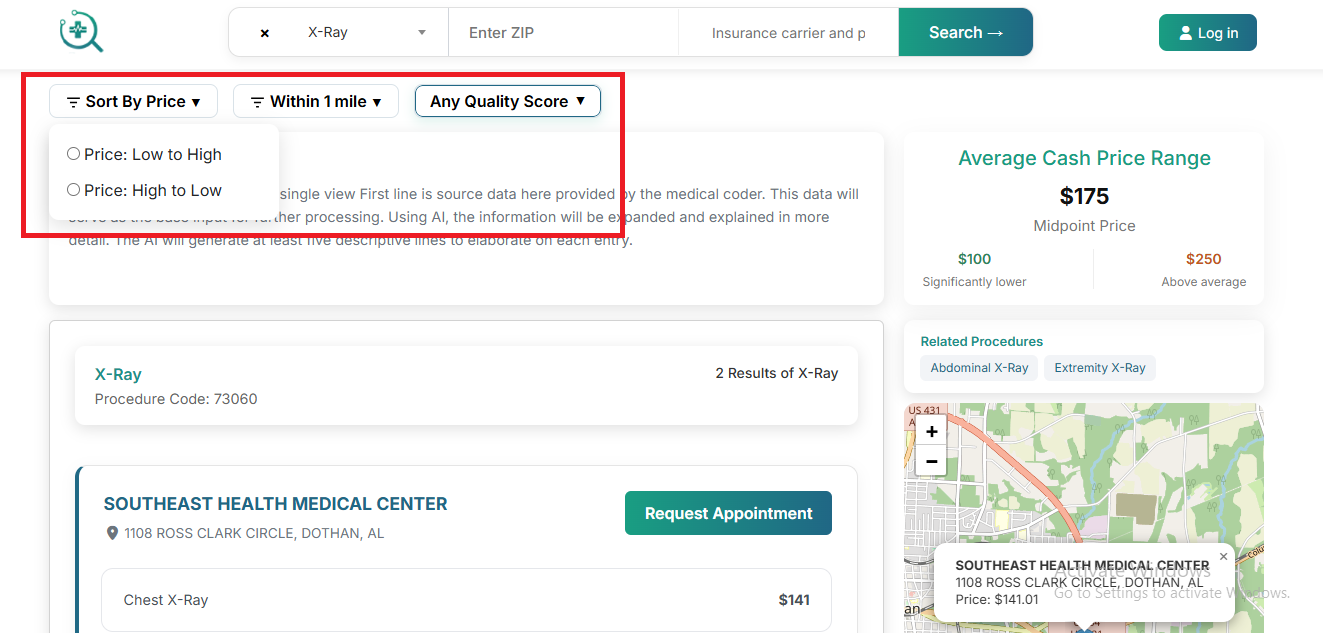
Use the Filter panel to narrow by distance, facility type, or insurance accepted.
Sort results by price (low to high), rating, or distance.
Click any result card to see full provider details and pricing breakdown. See where to go
Clicking a result card opens the Provider Detail Page. Here you'll see the full pricing breakdown, quality scores, accepted insurance, distance, and the Book Appointment and Compare buttons.
Provider Comparison Help
Compare hospitals and clinics side-by-side with ease.
From search results, click Compare on up to 3 providers.
A side-by-side comparison table will appear at the bottom of the screen.
Review differences in price, quality score, distance, and specializations.
Click View Full Profile on any provider to see detailed ratings and reviews. See where to go
The comparison tray sits fixed at the bottom of your screen with one column per provider. Hit View Full Profile under any column to open that provider's dedicated page with full ratings, reviews, and specialization details.
Uploading a Medical Bill or GFE
Get expert analysis of your bill in minutes.
Navigate to My Bills in your account dashboard.
Click Upload New Bill and drag-and-drop your file or browse to select it. See where to go
From your dashboard, find the My Bills tab in the top navigation. The Upload New Bill button is at the top-right of the bills list — clicking it opens the upload drawer shown below.
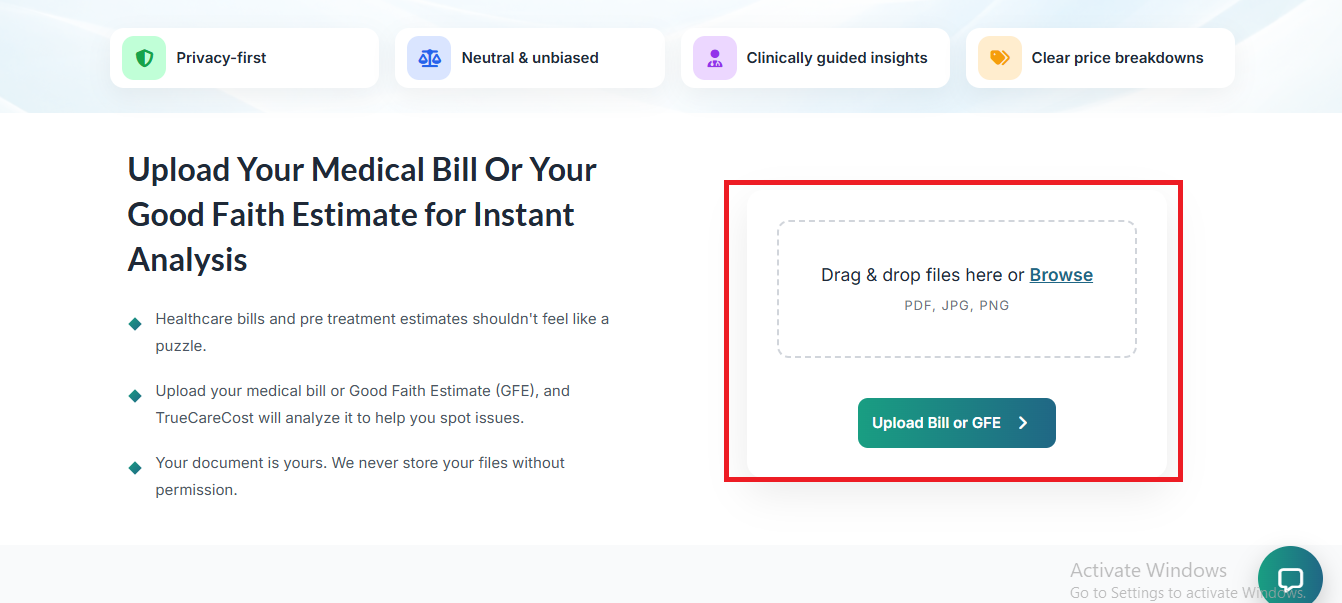
Select bill type: Medical Bill or Good Faith Estimate (GFE).
Hit Submit for Analysis — you'll receive a notification when the report is ready.
Understanding the Bill Analysis
Learn what every line item means and how to act on it.
Open your completed analysis from My Bills → View Report.
Each CPT / HCPCS code is listed with its description and benchmark price.
Review the Savings Opportunity section to see potential reductions.
Use the Dispute Template button to generate a pre-filled letter for your provider.
Booking an Appointment
Understand the full booking flow from request to confirmation.
On any provider profile, click Book Appointment.
Select your preferred date/time and the procedure you need.
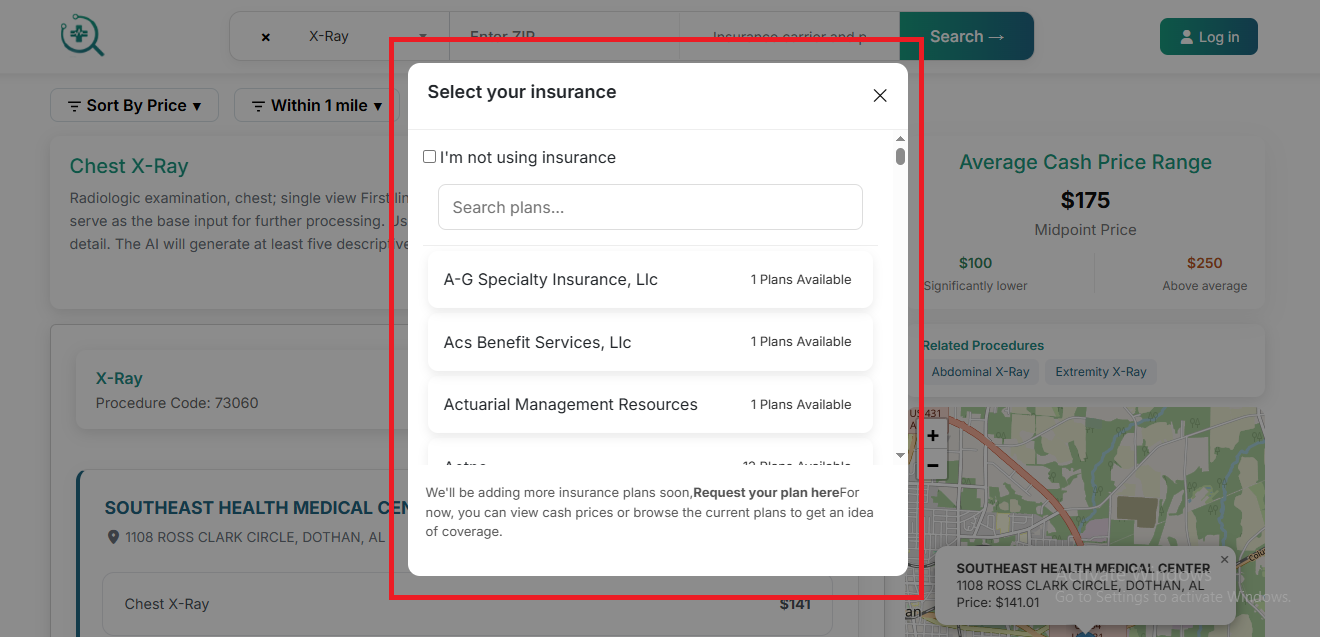
Confirm your insurance information (or select cash-pay) and submit. See where to go
The booking form pulls your saved insurance details from your profile automatically. Confirm or update them here. Toggle Cash Pay if paying out-of-pocket to see the self-pay rate instead. Then hit Confirm Request.
The provider typically responds within 1–2 business days to confirm or suggest alternatives.
Go to My Appointments in your dashboard.
Click the appointment and select Cancel or Reschedule.
Cancellations made 24+ hours ahead incur no penalty. Same-day cancellations may vary by provider.